Create and populate an Initiative page for your project!
Create and populate an Initiative page for your project!
This module will explain how to make an initiative page for your project, which you can link to courses, modules, and resources across the platform Embassy platform!
Why is this important?
Log in to the Embassy using your ORCiD
In order to make an initiative page for your project, you need to be logged into the Embassy using an ORCiD.
If you don't yet have an ORCiD, you can sign up for one here.
Add a new Initiative page
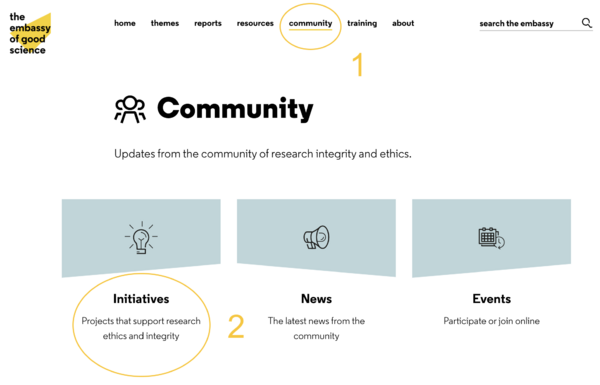
From the tabs at the top of the Embassy homepage, click the "Community" tab.
Once there, click the "Initiatives" block to navigate to the Initiatives section of the Embassy.
Once you are at the Initiatives section, click on the "Add Initiative" button in the top right corner to create a new page for your initiative.
Add information to your Initiative page!
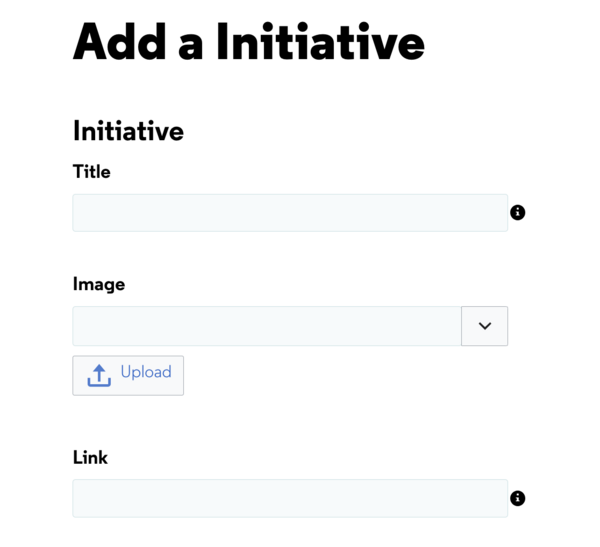
Now that you have a blank Initiative for your project, it's time to add some information! In order to save your initiative page, you need to add at least 3 things: a Title, an Image, and a Link.
Title - This should be the title of your project. The title you enter will be used to link to resources across the Embassy platform, so it would be wise to use the shortest title possible!
Image - The image which will display next to your project name across the Embassy. If your project has a logo or icon, you should use this! Accepted filetypes include jpg/jpeg, png, svg and xml files with a maximum size of 120mb.
Link - Here you can include a link to your project website, or to a suitable alternative like the repository for your project outputs. This must take the form of a valid URL.
Publish your Initiative page
Once you have completed the above steps, click the "Save Page" button. Your initiative page is now complete, and you should be able to see it listed in the Initiative section!
Link your content to your initiative!
Once you have published your Initiative page, it's time to link your content across the Embassy to your project!
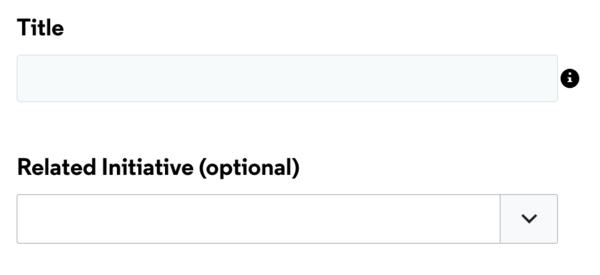
When adding or editing Modules, Courses, and Resources to the Embassy, you will have the option to select a "Related Initiative" (see below)
Select your project from the drop down menu and then save your content. Now your content should be listed on your Initiative page, easily accessible for users!


